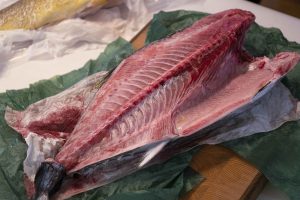
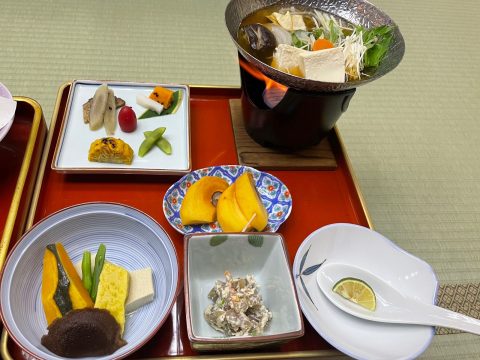
That red-fleshed fish that no matter how it’s cooked, it’s always delicious… Can you guess what I’m talking about? Yes, I’m talking about tuna, or maguro in Japanese. Most of the tuna caught in the Pacific is consumed by Japan, so this denotes the great fanaticism that the Japanese people have for this fish. No part of the tuna is wasted: from head to tail, meat, roe as well as the bones to make soup, known as あら汁/arajiru or fish broth.
Not all parts of the tuna are the same, right?
In the world of sushi, there is a classification of the different parts of the tuna, each with its own characteristics, and of course, with its price range.
The most common and “economical ” part is called akami. It is dark-colored lean meat obtained from the central part of the tuna.
The part containing the most fat comes from the belly of the tuna and is known as toro. There are two different types of it depending on the amount of fat they contain: chūtoro (medium-fat) and ōtoro. They are categorized in this way depending on color and, mainly, fat distribution. 
On the one hand, ōtoro is the marbled meat found in the section of the belly closest to the head. Due to its high fat content, its color is more white than red, and its texture reminiscent of butter, melting in the mouth. On the other hand, chūtoro is a more pale pink meat found in the belly and upper parts of the “back”. The ōtoro is more expensive, but many sushi experts prefer the texture and lower fat content of the chūtoro.
My sushi class experience
I had the fantastic opportunity to participate in a sort of “tuna immersion class”, learning how to cut a whole piece of tuna, its parts and how to prepare fresh nigiri. This is a basic guide on how to prepare nigiri, but if you are interested in going deeper into the subject, feel free to do so!
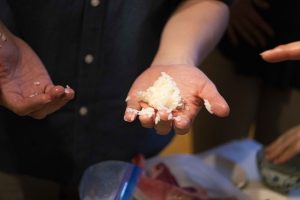
Once all the fish (in this case, tuna) has been cut and sliced, it is time to assemble the nigiri. For this, the ingredients needed to prepare the rice are obviously, rice, and rice vinegar with dissolved sugar to obtain a sweet taste, and a small amount of salt. Once everything has been integrated and mixed… it’s time to assemble our nigiri! To do this, we will use the most valuable tool: our hands. The first thing to do is to moisten our hands to prevent the rice from sticking to our hands and bothering us in the process (I know firsthand).
Then, we take a handful of rice and shape it until it acquires its form using just one hand. We take one of the pieces of tuna (or the fish we have) and, if desired, you can add a little wasabi to the part that is in contact with the rice (this will give an extra point to the nigiri, believe me!); then place the fish on the rice, shaping it until it is more or less the desired shape.
There are different techniques to make nigiri, all equally valid. So do your research on the different possibilities and use the one that suits you best. Dip in a little soy sauce, and eat!
The art of sushi
We often don’t realize how much work it takes to make what we eat. How can such a small piece of sushi take so much time and effort? I have always considered sushi to be my favorite Japanese food, so participating in such a class was an eye-opener. From cutting up the whole fish, preparing the rice and getting down to making our own nigiri, it took at least two hours, so you start to appreciate what you are eating and thank the people who prepare it.
If you have the opportunity one day to participate in a workshop or class in which sushi is prepared from zero, I highly recommend it. It will be a good experience for both the mind and the palate.